Battle of the Coral Sea.
USINFO | 2013-09-30 11:39
|
||||||||||||||||||||||||||||||
The Battle of the Coral Sea, fought during 4–8 May 1942, was a major naval battle in the Pacific Theater of World War II between the Imperial Japanese Navy and Allied naval and air forces from the United States and Australia. The battle was the first action in which aircraft carriersengaged each other, as well as the first in which neither side's ships sighted or fired directly upon the other.
In an attempt to strengthen their defensive positioning for their empire in the South Pacific, Imperial Japanese forces decided to invade and occupy Port Moresby in New Guinea and Tulagi in the southeastern Solomon Islands. The plan to accomplish this, called Operation MO, involved several major units of Japan's Combined Fleet, including two fleet carriers and a light carrier to provide air cover for the invasion fleets, under the overall command of Shigeyoshi Inoue. The U.S. learned of the Japanese plan through signals intelligence and sent two United States Navycarrier task forces and a joint Australian-American cruiser force, under the overall command of American Admiral Frank J. Fletcher, to oppose the Japanese offensive.
On 3–4 May, Japanese forces successfully invaded and occupied Tulagi, although several of their supporting warships were surprised and sunk or damaged by aircraft from the U.S. fleet carrier Yorktown. Now aware of the presence of U.S. carriers in the area, the Japanese fleet carriers entered the Coral Sea with the intention of finding and destroying the Allied naval forces.
Beginning on 7 May, the carrier forces from the two sides exchanged airstrikes over two consecutive days. The first day, the U.S. sank the Japanese light carrier ShЈhЈ, while the Japanese sank a U.S. destroyer and heavily damaged a fleet oiler (which was later scuttled). The next day, the Japanese fleet carrier ShЈkaku was heavily damaged, the U.S. fleet carrier Lexington was critically damaged (and was scuttled as a result), and the Yorktown was damaged. With both sides having suffered heavy losses in aircraft and carriers damaged or sunk, the two fleets disengaged and retired from the battle area. Because of the loss of carrier air cover, Inoue recalled the Port Moresby invasion fleet, intending to try again later.
Although a tactical victory for the Japanese in terms of ships sunk, the battle would prove to be a strategic victory for the Allies for several reasons. Japanese expansion, seemingly unstoppable until then, was turned back for the first time. More importantly, the Japanese fleet carriersShЈkaku and Zuikaku – one damaged and the other with a depleted aircraft complement – were unable to participate in the Battle of Midway, which took place the following month, ensuring a rough parity in aircraft between the two adversaries and contributing significantly to the U.S. victory in that battle. The severe losses in carriers at Midway prevented the Japanese from reattempting to invade Port Moresby from the ocean. Two months later, the Allies took advantage of Japan's resulting strategic vulnerability in the South Pacific and launched the Guadalcanal Campaign that, along with the New Guinea Campaign, eventually broke Japanese defenses in the South Pacific and was a significant contributing factor to Japan's ultimate defeat in World War II.
Background
On 7 December 1941, using aircraft carriers, the Japanese attacked the U.S. Pacific fleet at Pearl Harbor, Hawaii. The attack destroyed or crippled most of the U.S. Pacific Fleet's battleships and initiated a state of war between the two nations. In launching this war, Japanese leaders sought to neutralize the American fleet, seize possessions rich in natural resources, and obtain strategic military bases to defend their far-flung empire. At the same time that they were attacking Pearl Harbor, the Japanese attacked Malaya, causing the United Kingdom, Australia, and New Zealand to join the United States as Allies in the war against Japan (although Australia had formally joined World War 2 in 1939 when Germany invaded Poland). In the words of the Imperial Japanese Navy (IJN) Combined Fleet "Secret Order Number One", dated 1 November 1941, the goals of the initial Japanese campaigns in the impending war were to "(eject) British and American strength from the Netherlands Indies and the Philippines, (and) to establish a policy of autonomous self-sufficiency and economic independence."[7]
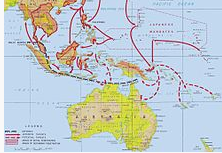
To support these goals, during the first few months of 1942, besides Malaya, Japanese forces attacked and successfully took control of the Philippines, Thailand, Singapore, the Netherlands East Indies, Wake Island, New Britain, the Gilbert Islands, and Guam while inflicting heavy losses on opposing Allied land, naval, and air forces. Japan planned to use these conquered territories to establish a perimeter defense for its empire from which it expected to employattritional tactics to defeat or exhaust any Allied counterattacks.[8]
Shortly after the war began, Japan's Naval General Staff recommended an invasion of Northern Australia to prevent Australia from being used as a base to threaten Japan's perimeter defenses in the South Pacific. The Imperial Japanese Army (IJA), however, rejected the recommendation, stating that it did not have the forces or shipping capacity available to conduct such an operation. At the same time, Vice Admiral Shigeyoshi Inoue, commander of the IJN's 4th Fleet(also called the South Seas Force) which consisted of most of the naval units in the South Pacific area, advocated the occupation of Tulagi in the southeastern Solomon Islands and Port Moresby in New Guinea, which would put northern Australia within range of Japanese land-based aircraft. Inoue believed the capture and control of these locations would provide greater security and defensive depth for the major Japanese base at Rabaul on New Britain. The navy's general staff and the IJA accepted Inoue's proposal and promoted further operations, using these locations as supporting bases, to seize New Caledonia, Fiji, and Samoa and thereby cut the supply and communication lines between Australia and the United States.[9]
In April 1942, the army and navy developed a plan that was titled Operation MO. The plan called for Port Moresby to be invaded from the ocean and secured by 10 May. The plan also included the seizure of Tulagi on 2–3 May, where the navy would establish a seaplane base for potential air operations against Allied territories and forces in the South Pacific and to provide a base for reconnaissance aircraft. Upon the completion of MO, the navy planned to initiate Operation RY, using ships released from the MO operation, to seize Nauru and Ocean Island for their phosphatedeposits on 15 May. Further operations against Fiji, Samoa and New Caledonia (Operation FS) were to be planned once the MO and RY operations were completed. Because of a damaging air attack by Allied land- and carrier-based aircraft on Japanese naval forces invading the Lae-Salamaua area in New Guinea in March, Inoue requested the Combined Fleet to send carriers to provide air cover for the MO forces. Inoue was especially worried about Allied bombers stationed at air bases in Townsville and Cooktown, Australia, beyond the range of his own bombers located at Rabaul and Lae.[10]
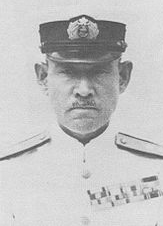
Admiral Isoroku Yamamoto, commander of Japan's Combined Fleet, was concurrently planning an operation for June that he hoped would lure the U.S. Navy's carriers, none of which were damaged in the Pearl Harbor attack, into a decisive showdown with his fleet in the central Pacific near Midway Atoll. In the meantime, however, Yamamoto detached some of his large warships, including two fleet carriers, a light carrier, a cruiser division, and two destroyer divisions, to support MO, and placed Inoue in charge of the naval portion of the MO operation.[11]
Allied response
Unknown to the Japanese, the U.S. Navy, led by the Communication Security Section of the Office of Naval Communications, had for several years enjoyed some successwith penetrating Japanese communication ciphers and codes. By March 1942, the U.S. was able to decipher up to 15% of the IJN's Ro or Naval Codebook D code (called the "JN-25B" code by the Americans) which was used by the IJN for approximately half of its communications. By the end of April the Americans were reading up to 85% of the signals broadcast in the Ro code.[12]
In March 1942, the U.S. first noticed mention of the MO operation in intercepted messages. On 5 April, the Americans intercepted an IJN message directing a carrier and other large warships to proceed to Inoue's area of operations. On 13 April, the British deciphered an IJN message informing Inoue that the Fifth Carrier Division, consisting of the fleet carriers ShЈkaku and Zuikaku, was en route to his command from Formosa via the main IJN base at Truk. The British passed the message to the Americans, along with their conclusion that Port Moresby was the likely target of MO.[13]
Admiral Chester Nimitz, the new commander of Allied forces in the Pacific, and his staff discussed the deciphered messages and agreed that the Japanese were likely initiating a major operation in the Southwest Pacific in early May with Port Moresby as the probable target. The Allies regarded Port Moresby as a key base for a planned counteroffensive, under Douglas MacArthur, against Japanese forces in the southwest Pacific area. Nimitz's staff also concluded that the Japanese operation might include carrier raids on Allied bases in Samoa and at Suva. Nimitz, after consultation with Admiral Ernest King, Commander in Chief of the United States Fleet, decided to contest the Japanese operation by sending all four of the Pacific fleet's available aircraft carriers to the Coral Sea. By 27 April, further signals intelligence confirmed most of the details and targets of the MO and RY plans.[14]
On 29 April, Nimitz issued orders that sent his four carriers and their supporting warships towards the Coral Sea. Task Force 17 (TF 17), commanded by Rear Admiral Fletcher and consisting of the carrier Yorktown, escorted by three cruisers and four destroyers and supported by a replenishment group of two oilers and two destroyers, was already in the South Pacific, having departed Tongatabu on 27 April en route to the Coral Sea. TF 11, commanded by Rear Admiral Aubrey Fitch and consisting of the carrier Lexington with two cruisers and five destroyers, was between Fiji and New Caledonia. TF 16, commanded by Vice Admiral William F. Halsey and including the carriers Enterprise and Hornet, just returned to Pearl Harbor from the Doolittle Raid in the central Pacific and therefore would not reach the South Pacific in time to participate in the battle. Nimitz placed Fletcher in command of Allied naval forces in the South Pacific area until Halsey arrived with TF 16.[15]Although the Coral Sea area was under MacArthur's command, Fletcher and Halsey were directed to continue to report to Nimitz while in the Coral Sea area, not to MacArthur.[16]
Based on intercepted radio traffic from TF 16 as it returned to Pearl Harbor, the Japanese assumed that all but one of the U.S. Navy's carriers were in the central Pacific. The Japanese did not know the location of the remaining carrier, but did not expect an American carrier response to MO until the operation was well underway.[17]
Battle
PreludeFor more details on this topic, see Battle of the Coral Sea order of battle.
During late April, the Japanese submarines RO-33 and RO-34 reconnoitered the area where landings were planned. The submarines investigated Rossel Island and the Deboyne Group anchorage in theLouisiade Archipelago, Jomard Channel, and the route to Port Moresby from the east. They did not sight any Allied ships in the area and returned to Rabaul on 23 and 24 April respectively.[18]
The Japanese Port Moresby Invasion Force, commanded by Rear Admiral KЈsЈ Abe, included 11 transport ships carrying about 5,000 soldiers from the IJA's South Seas Detachment plus approximately 500 troops from the 3rd Kure Special Naval Landing Force (SNLF). Escorting the transports was the Port Moresby Attack Force with one light cruiser and six destroyers under the command of Rear Admiral Sadamichi Kajioka. Abe's ships departed Rabaul for the 840 nmi (970 mi; 1,560 km) trip to Port Moresby on 4 May and were joined by Kajioka's force the next day. The ships, proceeding at 8 kn (9.2 mph; 15 km/h), planned to transit the Jomard Channel in the Louisiades to pass around the southern tip of New Guinea to arrive at Port Moresby by 10 May.[19] The Allied garrison at Port Moresby numbered around 5,333 men, but only half of these were infantry and all were badly equipped and undertrained.[20]
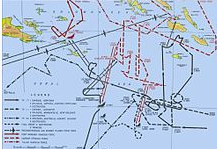
Leading the invasion of Tulagi was the Tulagi Invasion Force, commanded by Rear Admiral Kiyohide Shima, consisting of two minelayers, two destroyers, six minesweepers, two subchasers, and a transport ship carrying about 400 troops from the 3rd Kure SNLF. Supporting the Tulagi force was the Covering Group with the light carrier ShЈhЈ, four heavy cruisers, and one destroyer, commanded by Rear Admiral Aritomo GotЈ. A separate Cover Force (sometimes referred to as the Support Group), commanded by Rear Admiral Kuninori Marumo and consisting of two light cruisers, the seaplane tender Kamikawa Maru, and three gunboats, joined the Covering Group in providing distant protection for the Tulagi invasion. Once Tulagi was secured on 3 or 4 May, the Covering Group and Cover Force were to reposition to help screen the Port Moresby invasion.[22] Inoue directed the MO operation from the cruiser Kashima, with which he arrived at Rabaul from Truk on 4 May.[23]
GotЈ's force left Truk on 28 April, cut through the Solomons between Bougainville and Choiseul and took station near New Georgia Island. Marumo's support group sortied from New Ireland on 29 April headed for Thousand Ships Bay, Santa Isabel Island, to establish a seaplane base on 2 May to support the Tulagi assault. Shima's invasion force departed Rabaul on 30 April.[24]
The Carrier Strike Force with carriers Zuikaku and ShЈkaku, two heavy cruisers, and six destroyers sortied from Truk on 1 May. The strike force was commanded by Vice Admiral Takeo Takagi (flag on cruiser Myoko) with Rear Admiral ChЈБichi Hara, on Zuikaku, in tactical command of the carrier air forces. The Carrier Strike Force was to proceed down the eastern side of the Solomon Islands and enter the Coral Sea south of Guadalcanal. Once in the Coral Sea, the carriers were to provide air cover for the invasion forces, eliminate Allied air power at Port Moresby, and intercept and destroy any Allied naval forces which entered the Coral Sea in response.[25]
En route to the Coral Sea, Takagi's carriers were to deliver nine Zero fighter aircraft to Rabaul. Bad weather during two attempts to make the delivery on 2–3 May compelled the aircraft to return to the carriers, stationed 240 nmi (280 mi; 440 km) from Rabaul, and one of the Zeros was forced to ditch in the ocean. In order to try to keep to the MO timetable, Takagi was forced to abandon the delivery mission after the second attempt and directed his force towards the Solomon Islands to refuel.[26]
To give advance warning of the approach of any Allied naval forces, the Japanese sent submarines I-22, I-24, I-28 and I-29 to form a scouting line in the ocean about 450 nmi (520 mi; 830 km) southwest of Guadalcanal. Fletcher's forces, however, passed into the Coral Sea area before the submarines took station, and the Japanese were therefore unaware of their presence. Another submarine, I-21, which was sent to scout around Nouméa, was attacked by Yorktown aircraft on 2 May. The submarine took no damage and apparently did not realize that it was attacked by carrier aircraft. RO-33 and RO-34 were also deployed in an attempt to blockade Port Moresby, and arrived off the town on 5 May. Neither submarine engaged any ships during the battle.[27]
On the morning of 1 May, TF 17 and TF 11 united about 300 nmi (350 mi; 560 km) northwest of New Caledonia (16°16′S 162°20′E).[28] Fletcher immediately detached TF11 to refuel from the oiler Tippecanoe while TF 17 refueled from Neosho. TF 17 completed refueling the next day, but TF 11 reported that they would not be finished fueling until 4 May. Fletcher elected to take TF 17 northwest towards the Louisiades and ordered TF 11 to meet TF 44, which was en route from Sydney and Nouméa, on 4 May once refueling was complete. TF 44 was a joint Australia–U.S. warship force under MacArthur's command, led by Australian Rear Admiral John Crace, made up of the cruisers HMAS Australia, Hobart, and USS Chicago, along with three destroyers. Once completed refueling TF 11, Tippecanoedeparted the Coral Sea to deliver its remaining fuel to Allied ships at Efate.[29]
Tulagi
For more details on this topic, see Invasion of Tulagi (May 1942).
Early on 3 May, Shima's force arrived off Tulagi and began disembarking the naval troops to occupy the island. Tulagi was undefended: the small garrison of Australian commandos and a Royal Australian Air Force reconnaissance unit evacuated just before Shima's arrival. The Japanese forces immediately began construction of a seaplane and communications base. Aircraft from ShЈhЈ covered the landings until early afternoon, when GotЈ's force turned towards Bougainville to refuel in preparation to support the landings at Port Moresby.[30]
At 17:00 on 3 May, Fletcher was notified that the Japanese Tulagi invasion force were sighted the day before, approaching the southern Solomons. Unbeknownst to Fletcher, TF 11 completed refueling that morning ahead of schedule and was only 60 nmi (69 mi; 110 km) east of TF 17, but was unable to communicate its status because of Fletcher's orders to maintain radio silence. TF 17 changed course and proceeded at 27 kn (31 mph; 50 km/h) towards Guadalcanal to launch airstrikes against the Japanese forces at Tulagi the next morning.[31]
On 4 May, from a position 100 nmi (120 mi; 190 km) south of Guadalcanal (11°10′S 158°49′E), a total of 60 aircraft from TF 17 launched three consecutive strikes against Shima's forces off Tulagi. Yorktown's aircraft surprised Shima's ships and sank the destroyer Kikuzuki (09°07′S 160°12′E) and three of the minesweepers, damaged four other ships, and destroyed four seaplanes which were supporting the landings. The Americans lost one dive bomber and two fighters in the strikes, but all of the aircrews were eventually rescued. After recovering its aircraft late in the evening of 4 May, TF17 retired towards the south. In spite of the damage suffered in the carrier strikes, the Japanese continued construction of the seaplane base and began flying reconnaissance missions from Tulagi by 6 May.[32]
Takagi's Carrier Striking Force was refueling 350 nmi (400 mi; 650 km) north of Tulagi when it received word of Fletcher's strike on 4 May. Takagi terminated refueling, headed southeast, and sent scout planes to search east of the Solomons, believing that the American carriers were in that area. Since no Allied ships were in that area, the search planes found nothing.[33]
Air searches and decisions
At 08:16 on 5 May, TF 17 rendezvoused with TF 11 and TF 44 at a predetermined point 320 nmi (370 mi; 590 km) south of Guadalcanal (15°S 160°E). At about the same time, four F4F Wildcat fighter aircraft from Yorktown intercepted a Kawanishi Type 97 reconnaissance aircraft from the Yokohama Air Group of the 25th Air Flotilla based at the Shortland Islands and shot it down 11 nmi (13 mi; 20 km) from TF 11. The aircraft was unable to send a report before it crashed, but when it failed to return to base the Japanese correctly assumed that it was shot down by carrier aircraft.[34]
A message from Pearl Harbor notified Fletcher that radio intelligence deduced the Japanese planned to land their troops at Port Moresby on 10 May and their fleet carriers would likely be operating close to the invasion convoy. Armed with this information, Fletcher directed TF 17 to refuel from Neosho. After the refueling was completed on 6 May, he planned to take his forces north towards the Louisiades and do battle on 7 May.[35]
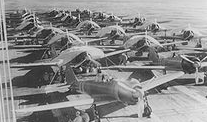
In the meantime, Takagi's carrier force steamed down the east side of the Solomons throughout the day on 5 May, turned west to pass south of San Cristobal(Makira), and entered the Coral Sea after transiting between Guadalcanal and Rennell Island in the early morning hours of 6 May. Takagi commenced refueling his ships 180 nmi (210 mi; 330 km) west of Tulagi in preparation for the carrier battle he expected would take place the next day.[36]
On 6 May, Fletcher absorbed TF 11 and TF 44 into TF 17. Believing the Japanese carriers were still well to the north near Bougainville, Fletcher continued to refuel. Reconnaissance patrols conducted from the American carriers throughout the day failed to locate any of the Japanese naval forces, because they were located just beyond scouting range.[37]
At 10:00, a Kawanishi reconnaissance flying boat from Tulagi sighted TF 17 and notified its headquarters. Takagi received the report at 10:50. At that time, Takagi's force was about 300 nmi (350 mi; 560 km) north of Fletcher, near the maximum range for his carrier aircraft. Takagi, whose ships were still refueling, was not yet ready to engage in battle. He concluded, based on the sighting report, TF 17 was heading south and increasing the range. Furthermore, Fletcher's ships were under a large, low-hanging overcast which Takagi and Hara felt would make it difficult for their aircraft to find the American carriers. Takagi detached his two carriers with two destroyers under Hara's command to head towards TF 17 at 20 kn (23 mph; 37 km/h) in order to be in position to attack at first light the next day while the rest of his ships completed refueling.[38]
American B-17 bombers based in Australia[39] and staging through Port Moresby attacked the approaching Port Moresby invasion forces, including GotЈ's warships, several times during the day on 6 May without success. MacArthur's headquarters radioed Fletcher with reports of the attacks and the locations of the Japanese invasion forces. MacArthur's fliers' reports of seeing a carrier (ShЈhЈ) about 425 nmi (489 mi; 787 km) northwest of TF17 further convinced Fletcher fleet carriers were accompanying the invasion force.[40]
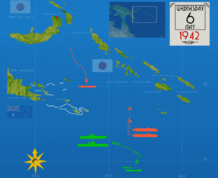
Animated map of the battle, 6–8 May
At 18:00, TF 17 completed fueling and Fletcher detached Neosho with a destroyer, Sims, to take station further south at a prearranged rendezvous (16°S 158°E). TF 17 then turned to head northwest towards Rossel Island in the Louisiades. Unbeknownst to the two adversaries, their carriers were only 70 nmi (130 km) away from each other by 20:00 that night. At 20:00 (13°20′S 157°40′E), Hara reversed course to meet Takagi who completed refueling and was now heading in Hara's direction.[41]Late on 6 May or early on 7 May, Kamikawa Maru set up a seaplane base in the Deboyne Group in order to help provide air support for the invasion forces as they approached Port Moresby. The rest of Marumo's Cover Force then took station near the D'Entrecasteaux Islands to help screen Abe's oncoming convoy.[42]
Carrier battle, first day
Morning strikes
At 06:25 on 7 May, TF 17 was 115 nmi (132 mi; 213 km) south of Rossel Island (13°20′S 154°21′E). At this time, Fletcher sent Crace's cruiser and destroyer force, now designated Task Group 17.3 (TG 17.3), to block the Jomard Passage. Fletcher understood that Crace would be operating without air cover since TF 17's carriers would be busy trying to locate and attack the Japanese carriers. The detachment of Crace's warships reduced the anti-aircraft defenses for Fletcher's carriers. Nevertheless, Fletcher decided that the risk was necessary in order to ensure that the Japanese invasion forces could not slip through to Port Moresby while he was engaged with the Japanese carriers.[43]
Believing Takagi's carrier force was somewhere north of his location, in the vicinity of the Louisiades, Fletcher directed Yorktown to send 10 SBD dive bombers as scouts to search that area beginning at 06:19. In the meantime, Takagi, located approximately 300 nmi (350 mi; 560 km) east of Fletcher (13°12′S 158°05′E), launched 12 Type 97 carrier bombers at 06:00 to scout for TF 17. Hara believed that Fletcher's ships were located to the south and advised Takagi to send the aircraft to search that area. Around the same time, GotЈ's cruisers Kinugasa and Furutakalaunched four Kawanishi E7K2 Type 94 floatplanes to search southeast of the Louisiades. Augmenting their search were several floatplanes from Deboyne, four Kawanishi Type 97s from Tulagi, and three Mitsubishi Type 1 bombers from Rabaul. Each side readied the rest of its carrier attack aircraft to launch immediately once the enemy was located.[44]
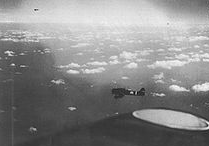
At 07:22 one of Takagi's carrier scouts, from ShЈkaku, reported that it located American ships bearing 182°, 163 nmi (188 mi; 302 km) from Takagi. At 07:45, the scout confirmed that it had located "one carrier, one cruiser, and three destroyers". Another ShЈkaku scout aircraft quickly confirmed the sighting.[45]The ShЈkaku aircraft actually sighted and misidentified the Neosho and Sims. Believing that he had located the American carriers, Hara, with Takagi's concurrence, immediately launched all of his available aircraft. A total of 78 aircraft—18 Zero fighters, 36 Type 99 dive bombers, and 24 torpedo aircraft—began launching from ShЈkaku and Zuikaku at 08:00 and were on their way by 08:15 towards the reported sighting.[46]
At 08:20, one of the Furutaka aircraft found Fletcher's carriers and immediately reported it to Inoue's headquarters at Rabaul, which passed the report on to Takagi. The sighting was confirmed by a Kinugasa floatplane at 08:30. Takagi and Hara, confused by the conflicting sighting reports they were receiving, decided to continue with the strike on the ships to their south, but turned their carriers towards the northwest to close the distance with Furutaka'sreported contact.[47] Takagi and Hara considered that the conflicting reports might mean that the U.S. carrier forces were operating in two separate groups.[48]
At 08:15, a Yorktown SBD piloted by John L. Nielsen sighted GotЈ's force screening the invasion convoy. Nielsen, making an error in his coded message, reported the sighting as "two carriers and four heavy cruisers" at 10°3′S 152°27′E, 225 nmi (259 mi; 417 km) northwest of TF17.[49] Fletcher concluded that the Japanese main carrier force was located and ordered the launch of all available carrier aircraft to attack. By 10:13, the American strike of 93 aircraft – 18 F4F Wildcats, 53 SBD dive bombers, and 22 TBD Devastator torpedo bombers – was on its way. At 10:19, Nielsen landed and discovered his coding error. Although GotЈ's force included ShЈhЈ, Nielsen thought that he saw two cruisers and four destroyers. At 10:12, however, Fletcher received a report from a flight of three United States Army B-17s[50] of an aircraft carrier, ten transports, and 16 warships 30 nmi (35 mi; 56 km) south of Nielsen's sighting at 10°35′S 152°36′E. The B-17s actually saw the same thing as Nielsen: ShЈhЈ, GotЈ's cruisers, plus the Port Moresby Invasion Force. Believing that the B-17 sighting was the main Japanese carrier force, Fletcher directed the airborne strike force towards this target.[51]
At 09:15, Takagi's strike force reached its target area, sighted Neosho and Sims, and searched in vain for the American carriers. Finally, at 10:51 ShЈkakuscout aircrews realized they were mistaken in their identification of the oiler and destroyer as aircraft carriers. Takagi now realized the American carriers were between him and the invasion convoy, placing the invasion forces in extreme danger. Takagi ordered his aircraft to immediately attack Neosho and Sims and then return to their carriers as quickly as possible. At 11:15, the torpedo bombers and fighters abandoned the mission and headed back towards the carriers with their ordnance while the 36 dive bombers attacked the two American ships.[52]
Four dive bombers attacked Sims and the rest dived on Neosho. The destroyer was hit by three bombs, broke in half, and sank immediately, killing all but 14 of her 192-man crew. Neosho was hit by seven bombs. One of the dive bombers, hit by anti-aircraft fire, crashed into the oiler. Heavily damaged and without power, Neosho was left drifting and slowly sinking (16°09′S 158°03′E). Before losing power, Neosho was able to notify Fletcher by radio that she was under attack and in trouble, but garbled any further details as to just who or what was attacking her and gave wrong coordinates (16°25′S 157°31′E) for its position.[53]
The American strike aircraft sighted ShЈhЈ a short distance northeast of Misima Island at 10:40 and deployed to attack. The Japanese carrier was protected by six Zeros and two Type 96 'Claude' fighters flying combat air patrol (CAP), as the rest of the carrier's aircraft were being prepared below decks for a strike against the American carriers. GotЈ's cruisers surrounded the carrier in a diamond formation, 3,000–5,000 yd (2,700–4,600 m) off each of ShЈhЈ's corners.[54]
Attacking first, Lexington's air group, led by Commander William B. Ault, hit ShЈhЈ with two 1,000 lb (450 kg) bombs and five torpedoes, causing severe damage. At 11:00, Yorktown's air group attacked the burning and now almost stationary carrier, scoring with up to 11 more 1,000 lb (450 kg) bombs and at least two torpedoes. Torn apart, ShЈhЈ sank at 11:35 (10°29′S 152°55′E). Fearing more air attacks, GotЈ withdrew his warships to the north, but sent the destroyer Sazanami back at 14:00 to rescue survivors. Only 203 of the carrier's 834-man crew were recovered. Three American aircraft were lost in the attack, including two SBDs from Lexington and one from Yorktown. All of ShЈhЈ's aircraft complement of 18 was lost, but three of the CAP fighter pilots were able to ditch at Deboyne and survived. At 12:10, using a prearranged message to signal TF 17 on the success of the mission, Lexington SBD pilot and squadron commander Robert E. Dixon radioed "Scratch one flat top! Signed Bob."[55]
Afternoon operations
The American aircraft returned and landed on their carriers by 13:38. By 14:20, the aircraft were rearmed and ready to launch against the Port Moresby Invasion Force or GotЈ's cruisers. Fletcher, however, was concerned that the whereabouts of the rest of the Japanese fleet carriers were still unknown. He was informed that Allied intelligence sources believed that up to four Japanese carriers might be supporting the MO operation. Fletcher concluded that by the time his scout aircraft located the remaining Japanese carriers it would be too late in the day to mount a strike. Thus, Fletcher decided to hold off on another strike this day and remain concealed under the thick overcast with fighters ready in defense. Fletcher turned TF17 southwest.[56]
Apprised of the loss of ShЈhЈ, Inoue ordered the invasion convoy to temporarily withdraw to the north and ordered Takagi, at this time located 225 nmi (259 mi; 417 km) east of TF 17, to destroy the American carrier forces. As the invasion convoy reversed course, it was bombed by eight U.S. Army B-17s, but was not damaged. GotЈ and Kajioka were told to assemble their ships south of Rossel Island for a night surface battle if the American ships came within range.[57]
At 12:40, a Deboyne-based seaplane sighted and reported Crace's force bearing 175°, 78 nmi (90 mi; 144 km) from Deboyne. At 13:15, an aircraft from Rabaul sighted Crace's force but submitted an erroneous report, stating the force contained two carriers and was located bearing 205°, 115 nmi (213 km) from Deboyne. Based on these reports, Takagi, who was still awaiting the return of all of his aircraft from attacking Neosho, turned his carriers due west at 13:30 and advised Inoue at 15:00 that the U.S. carriers were at least 430 nmi (490 mi; 800 km) west of his location and that he would therefore be unable to attack them that day.[58]

Inoue's staff directed two groups of attack aircraft from Rabaul, already airborne since that morning, towards Crace's reported position. The first group included 12 torpedo-armed Type 1 bombers and the second group comprised 19 Mitsubishi Type 96 land attack aircraft armed with bombs. Both groups found and attacked Crace's ships at 14:30 and claimed to have sunk a "California-type" battleship and damaged another battleship and cruiser. In reality, Crace's ships were undamaged and shot down four Type 1s. A short time later, three U.S. Army B-17s mistakenly bombed Crace, but caused no damage.[59]
Crace at 15:26 radioed Fletcher he could not complete his mission without air support. Crace retired southward to a position about 220 nmi (250 mi; 410 km) southeast of Port Moresby to increase the range from Japanese carrier- or land-based aircraft while remaining close enough to intercept any Japanese naval forces advancing beyond the Louisiades through either the Jomard Passage or the China Strait. Crace's ships were low on fuel, and as Fletcher was maintaining radio silence (and had not informed him in advance), Crace had no idea of Fletcher's location, status, or intentions.[60]
Shortly after 15:00, Zuikaku monitored a message from a Deboyne-based reconnaissance aircraft reporting (incorrectly) Crace's force altered course to 120° true (southeast). Takagi's staff assumed the aircraft was shadowing Fletcher's carriers and determined if the Allied ships held that course, they would be within striking range shortly before nightfall. Takagi and Hara determined to attack immediately with a select group of aircraft, minus fighter escort, even though it meant the strike would return after dark.[61]
To try to confirm the location of the American carriers, at 15:15 Hara sent a flight of eight torpedo bombers as scouts to sweep 200 nmi (230 mi; 370 km) westward. About that same time, the dive bombers returned from their attack on Neosho and landed. Six of the weary dive bomber pilots were told they would be immediately departing on another mission. Choosing his most experienced crews, at 16:15 Hara launched 12 dive bombers and 15 torpedo planes with orders to fly bearing 277° to 280 nmi (320 mi; 520 km). The eight scout aircraft reached the end of their 200 nmi (230 mi; 370 km) search leg and turned back without seeing Fletcher's ships.[62]
At 17:47, TF 17 – operating under thick overcast 200 nmi (230 mi; 370 km) west of Takagi – detected the Japanese strike on radar heading in their direction, turned southeast into the wind, and vectored 11 CAP Wildcats, including one piloted by James H. Flatley, to intercept. Taking the Japanese formation by surprise, the Wildcats shot down seven torpedo bombers and one dive bomber, and heavily damaged another torpedo bomber (which later crashed), at a cost of three Wildcats lost.[63]
Having taken heavy losses in the attack, which also scattered their formations, the Japanese strike leaders canceled the mission after conferring by radio. The Japanese aircraft all jettisoned their ordnance and reversed course to return to their carriers. The sun set at 18:30. Several of the Japanese dive bombers encountered the American carriers in the darkness, around 19:00, and briefly confused as to their identity, circled in preparation for landing before anti-aircraft fire from TF 17's destroyers drove them away. By 20:00, TF 17 and Takagi were about 100 nmi (120 mi; 190 km) apart. Takagi turned on his warships' searchlights to help guide the 18 surviving aircraft back and all were recovered by 22:00.[64]
In the meantime, at 15:18 and 17:18 Neosho was able to radio TF 17 she was drifting northwest in a sinking condition. Neosho's 17:18 report gave wrong coordinates, which would hamper subsequent U.S. rescue efforts to locate the doomed oiler. More significantly, the news informed Fletcher his only nearby available fuel supply was gone.[65]
As nightfall ended aircraft operations for the day, Fletcher ordered TF 17 to head west and prepared to launch a 360° search at first light. Crace also turned west to stay within striking range of the Louisiades. Inoue directed Takagi to make sure he destroyed the U.S. carriers the next day, and postponed the Port Moresby landings to 12 May. Takagi elected to take his carriers 120 nmi (140 mi; 220 km) north during the night so he could concentrate his morning search to the west and south and ensure that his carriers could provide better protection for the invasion convoy. GotЈ and Kajioka were unable to position and coordinate their ships in time to attempt a night attack on the Allied warships.[66]
Both sides expected to find each other early the next day, and spent the night preparing their strike aircraft for the anticipated battle as their exhausted aircrews attempted to get a few hours sleep. In 1972, U.S. Vice Admiral H. S. Duckworth, after reading Japanese records of the battle, commented, "Without a doubt, May 7, 1942, vicinity of Coral Sea, was the most confused battle area in world history."[67] Hara later told Yamamoto's chief of staff, Admiral Matome Ugaki, he was so frustrated with the "poor luck" the Japanese experienced on 7 May that he felt like quitting the navy.[68]
Carrier battle, second day
Attack on the Japanese carriers
At 06:15 on 8 May, from a position 100 nmi (120 mi; 190 km) east of Rossel Island (10°25′S 154°5′E), Hara launched seven torpedo bombers to search the area bearing 140–230° south and out to 250 nmi (290 mi; 460 km) from the Japanese carriers. Assisting in the search were three Kawanishi Type 97s from Tulagi and four Type 1 bombers from Rabaul. At 07:00, the carrier striking force turned to the southwest and was joined by two of GotЈ's cruisers, Kinugasa and Furutaka, for additional screening support. The invasion convoy, GotЈ, and Kajioka steered towards a rendezvous point 40 nmi (46 mi; 74 km) east of Woodlark Island to await the outcome of the carrier battle. During the night, the warm frontal zone with low-hanging clouds which had helped hide the American carriers on 7 May moved north and east and now covered the Japanese carriers, limiting visibility to between 2 nmi (2.3 mi; 3.7 km) and 15 nmi (17 mi; 28 km).[69]
At 06:35, TF 17 – operating under Fitch's tactical control and positioned 180 nmi (210 mi; 330 km) southeast of the Lousiades, launched 18 SBDs to conduct a 360° search out to 200 nmi (230 mi; 370 km). The skies over the American carriers were mostly clear, with 17 nmi (20 mi; 31 km) visibility.[70]
At 08:20, a Lexington SBD piloted by Joseph G. Smith spotted the Japanese carriers through a hole in the clouds and notified TF 17. Two minutes later, aShЈkaku search plane commanded by KenzЈ Kanno sighted TF 17 and notified Hara. The two forces were about 210 nmi (240 mi; 390 km) away from each other. Both sides raced to launch their strike aircraft.[71]
At 09:15, the Japanese carriers launched a combined strike of 18 fighters, 33 dive bombers, and 18 torpedo planes, commanded by Lieutenant Commander Kakuichi Takahashi. The American carriers each launched a separate strike. Yorktown's group consisted of six fighters, 24 dive bombers, and nine torpedo planes and was on its way by 09:15. Lexington's group of nine fighters, 15 dive bombers, and 12 torpedo planes was off at 09:25. Both the American and Japanese carrier warship forces turned to head directly for each other's location at high speed in order to shorten the distance their aircraft would have to fly on their return legs.[72]
Yorktown's dive bombers, led by William O. Burch, reached the Japanese carriers at 10:32, and paused to allow the slower torpedo squadron to arrive so that they could conduct a simultaneous attack. At this time, ShЈkaku and Zuikaku were about 10,000 yd (9,100 m) apart, withZuikaku hidden under a rain squall of low-hanging clouds. The two carriers were protected by 16 CAP Zero fighters. The Yorktown dive bombers commenced their attacks at 10:57 on ShЈkaku and hit the radically maneuvering carrier with two 1,000 lb (450 kg) bombs, tearing open the forecastle and causing heavy damage to the carrier's flight and hangar decks. The Yorktown torpedo planes missed with all of their ordnance. Two U.S. dive bombers and two CAP Zeros were shot down during the attack.[73]
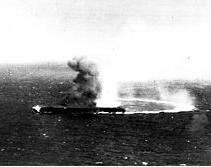
Lexington's aircraft arrived and attacked at 11:30. Two dive bombers attacked ShЈkaku, hitting the carrier with one 1,000 lb (450 kg) bomb, causing further damage. Two other dive bombers dove on Zuikaku, missing with their bombs. The rest of Lexington's dive bombers were unable to find the Japanese carriers in the heavy clouds. Lexington's TBDs missed ShЈkaku with all 11 of their torpedoes. The 13 CAP Zeros on patrol at this time shot down three Wildcats.[74]
With her flight deck heavily damaged and 223 of her crew killed or wounded, ShЈkaku was unable to conduct further aircraft operations. Her captain, Takatsugu JЈjima, requested permission from Takagi and Hara to withdraw from the battle, to which Takagi agreed. At 12:10, ShЈkaku, accompanied by two destroyers, retired to the northeast.[75]
Attack on the U.S. carriers
At 10:55, Lexington's CXAM-1 radar detected the inbound Japanese aircraft at a range of 68 nmi (78 mi; 126 km) and vectored nine Wildcats to intercept. Expecting the Japanese torpedo bombers to be at a much lower altitude than they actually were, six of the Wildcats were stationed too low, and thus missed the Japanese aircraft as they passed by overhead.[76] Because of the heavy losses in aircraft suffered the night before, the Japanese could not execute a full torpedo attack on both carriers. Lieutenant Commander Shigekazu Shimazaki, commanding the Japanese torpedo planes, sent 14 to attack Lexington and four to attack Yorktown. A Wildcat shot down one and 8 patrolling Yorktown SBDs destroyed three more as the Japanese torpedo planes descended to take attack position. Four SBDs were shot down by Zeros escorting the torpedo planes.[77]
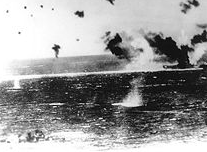
The Japanese attack began at 11:13 as the carriers, stationed 3,000 yd (2,700 m) apart, and their escorts opened fire with anti-aircraft guns. The four torpedo planes which attacked Yorktown all missed. The remaining torpedo planes successfully employed a pincer attack on Lexington, which had a much larger turning radius than Yorktown, and, at 11:20, hit her with two Type 91 torpedoes. The first torpedo buckled the port aviation gasoline stowage tanks. Undetected, gasoline vapors spread into surrounding compartments. The second torpedo ruptured the port water main, reducing water pressure to the three forward firerooms and forcing the associated boilers to be shut down. The ship, however, could still make 24 kn (28 mph; 44 km/h) with her remaining boilers. Four of the Japanese torpedo planes were shot down by anti-aircraft fire.[78]
The 33 Japanese dive bombers circled to attack from upwind, and thus did not begin their dives from 14,000 ft (4,300 m) until three to four minutes after the torpedo planes began their attacks. The 19 ShЈkaku dive bombers, under Takahashi, lined up on Lexington while the remaining 14, directed by Tamotsu Ema, targeted Yorktown. Escorting Zeros shielded Takahashi's aircraft from four Lexington CAP Wildcats which attempted to intervene, but two Wildcats circling above Yorktown were able to disrupt Ema's formation. Takahashi's bombers damaged Lexington with two bomb hits and several near misses, causing fires which were contained by 12:33. At 11:27, Yorktown was hit in the center of her flight deck by a single 250 kg (550 lb), semi-armor-piercing bomb which penetrated four decks before exploding, causing severe structural damage to an aviation storage room and killing or seriously wounding 66 men. Up to 12 near misses damaged Yorktown's hull below the waterline. Two of the dive bombers were shot down by a CAP Wildcat during the attack.[79]
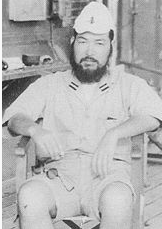
As the Japanese aircraft completed their attacks and began to withdraw, believing that they inflicted fatal damage to both carriers, they ran a gauntlet of CAP Wildcats and SBDs. In the ensuing aerial duels, three SBDs and three Wildcats for the U.S., and three torpedo bombers, one dive bomber, and one Zero for the Japanese were downed. By 12:00, the U.S. and Japanese strike groups were on their way back to their respective carriers. During their return, aircraft from the two adversaries passed each other in the air, resulting in more air-to-air altercations. Kanno's and Takahashi's aircraft were shot down, killing both of them.[80]
Recovery, reassessment, and retreat
The strike forces, with many damaged aircraft, reached and landed on their respective carriers between 12:50 and 14:30. In spite of damage, Yorktown and Lexingtonwere both able to recover aircraft from their returning air groups. During recovery operations, for various reasons the U.S. lost an additional five SBDs, two TBDs, and a Wildcat, and the Japanese lost two Zeros, five dive bombers, and one torpedo plane. Forty-six of the original 69 aircraft from the Japanese strike force returned from the mission and landed on Zuikaku. Of these, three more Zeros, four dive bombers, and five torpedo planes were judged damaged beyond repair and were immediately jettisoned into the ocean.[81]
As TF 17 recovered its aircraft, Fletcher assessed the situation. The returning aviators reported they heavily damaged one carrier, but that another had escaped damage. Fletcher noted that both his carriers were hurt and that his air groups had suffered high fighter losses. Fuel was also a concern due to the loss of Neosho. At 14:22, Fitch notified Fletcher that he had reports of two undamaged Japanese carriers and that this was supported by radio intercepts. Believing that he faced overwhelming Japanese carrier superiority, Fletcher elected to withdraw TF17 from the battle. Fletcher radioed MacArthur the approximate position of the Japanese carriers and suggested that he attack with his land-based bombers.[82]
Around 14:30, Hara informed Takagi that only 24 Zeros, eight dive bombers, and four torpedo planes from the carriers were currently operational. Takagi was worried about his ships' fuel levels; his cruisers were at 50% and some of his destroyers were as low as 20%. At 15:00, Takagi notified Inoue his fliers had sunk two American carriers – Yorktown and a "Saratoga-class" – but heavy losses in aircraft meant he could not continue to provide air cover for the invasion. Inoue, whose reconnaissance aircraft sighted Crace's ships earlier that day, recalled the invasion convoy to Rabaul, postponed MO to 3 July, and ordered his forces to assemble northeast of the Solomons to begin the RY operation. Zuikaku and her escorts turned towards Rabaul while ShЈkaku headed for Japan.[83]
Aboard Lexington, damage control parties put out the fires and restored her to operational condition, however at 12:47, sparks from unattended electric motors ignited gasoline fumes near the ship's central control station. The resulting explosion killed 25 men and started a large fire. Around 14:42, another large explosion occurred, starting a second severe fire. A third explosion occurred at 15:25 and at 15:38 the ship's crew reported the fires as uncontrollable.Lexington's crew began abandoning ship at 17:07. After the carrier's survivors were rescued, including Fitch and the carrier's captain, Frederick C. Sherman, at 19:15 the destroyer Phelps fired five torpedoes into the burning ship, which sank in 2,400 fathoms at 19:52 (15°15′S 155°35′E). Two hundred and sixteen of the carrier's 2,951-man crew went down with the ship, along with 36 aircraft. Phelps and the other assisting warships left immediately to rejoin Yorktownand her escorts, which departed at 16:01, and TF17 retired to the southwest. Later that evening, MacArthur informed Fletcher that eight of his B-17s had attacked the invasion convoy and that it was retiring to the northwest.[84]
That evening, Crace detached Hobart, which was critically low on fuel, and the destroyer Walke, which was having engine trouble, to proceed to Townsville. Crace overheard radio reports saying the enemy invasion convoy had turned back, but, unaware Fletcher had withdrawn, he remained on patrol with the rest of TG17.3 in the Coral Sea in case the Japanese invasion force resumed its advance towards Port Moresby.[85]
Aftermath
On 9 May, TF 17 altered course to the east and proceeded out of the Coral Sea via a route south of New Caledonia. Nimitz ordered Fletcher to return Yorktown to Pearl Harbor as soon as possible after refueling at Tongatabu. During the day, U.S. Army bombers attacked Deboyne and Kamikawa Maru, inflicting unknown damage. In the meantime, having heard nothing from Fletcher, Crace deduced that TF17 had departed the area. At 01:00 on 10 May, hearing no further reports of Japanese ships advancing towards Port Moresby, Crace turned towards Australia and arrived at Cid Harbor, 130 nmi (150 mi; 240 km) south of Townsville, on 11 May.[86]At 22:00 on 8 May, Yamamoto ordered Inoue to turn his forces around, destroy the remaining Allied warships, and complete the invasion of Port Moresby. Inoue did not cancel the recall of the invasion convoy, but ordered Takagi and GotЈ to pursue the remaining Allied warship forces in the Coral Sea. Critically low on fuel, Takagi's warships spent most of 9 May refueling from the fleet oiler TЈhЈ Maru. Late in the evening of 9 May, Takagi and GotЈ headed southeast, then southwest into the Coral Sea. Seaplanes from Deboyne assisted Takagi in searching for TF 17 on the morning of 10 May. Fletcher and Crace, however, were already well on their way out of the area. At 13:00 on 10 May, Takagi concluded that the enemy was gone and decided to turn back towards Rabaul. Yamamoto concurred with Takagi's decision and ordered Zuikaku to return to Japan to replenish her air groups. At the same time, Kamikawa Maru packed up and departed Deboyne.[87] At noon on 11 May, a U.S. Navy PBY on patrol from Nouméa sighted the drifting Neosho (15°35′S 155°36′E). The U.S. destroyer Henley responded and rescued 109 Neosho and 14 Sims survivors later that day, then scuttled the tanker with torpedoes.[88]
On 10 May, the RY operation commenced. After the operation's flagship, minelayer Okinoshima, was sunk by the American submarine S-42 on 12 May (05°06′S 153°48′E), the landings were postponed to 17 May. In the meantime, Halsey's TF 16 reached the South Pacific near Efate and, on 13 May, headed north to contest the Japanese approach to Nauru and Ocean Island. On 14 May, Nimitz, having obtained intelligence concerning the Combined Fleet's upcoming operation against Midway, ordered Halsey to make sure that Japanese scout aircraft sighted his ships the next day, after which he was to return to Pearl Harbor immediately. At 10:15 on 15 May, a Kawanishi reconnaissance aircraft from Tulagi sighted TF 16 445 nmi (512 mi; 824 km) east of the Solomons. Halsey's feint worked. Fearing a carrier air attack on his exposed invasion forces, Inoue immediately canceled RY and ordered his ships back to Rabaul and Truk. On 19 May, TF 16 – which returned to the Efate area to refuel – turned towards Pearl Harbor and arrived there on 26 May. Yorktown reached Pearl the following day.[89]
ShЈkaku reached Kure, Japan, on 17 May, almost capsizing en route during a storm due to her battle damage. Zuikaku arrived at Kure on 21 May, having made a brief stop at Truk on 15 May. Acting on signals intelligence, the U.S. placed eight submarines along the projected route of the carriers' return paths to Japan, but the submarines were not able to make any attacks. Japan's Naval General Staff estimated that it would take two to three months to repair ShЈkakuand replenish the carriers' air groups. Thus, both carriers would be unable to participate in Yamamoto's upcoming Midway operation. The two carriers rejoined the Combined Fleet on 14 July and were key participants in subsequent carrier battles against U.S. forces. The five I-class submarines supporting the MOoperation were retasked to support an attack on Sydney Harbour three weeks later as part of a campaign to disrupt Allied supply lines. En route to Truk, however, I-28 was torpedoed on 17 May by the U.S. submarine Tautog and sunk with all hands.[90]
The battle was the first naval engagement in history in which the participating ships never sighted or fired directly at each other. Instead, manned aircraft acted as the offensive artillery for the ships involved. Thus, the respective commanders were participating in a new type of warfare, carrier-versus-carrier, with which neither had any experience. In H. P. Willmot's words, the commanders "had to contend with uncertain and poor communications in situations in which the area of battle had grown far beyond that prescribed by past experience but in which speeds had increased to an even greater extent, thereby compressing decision-making time."[91] Because of the greater speed with which decisions were required, the Japanese were at a disadvantage as Inoue was too far away at Rabaul to effectively direct his naval forces in real time, in contrast to Fletcher who was on-scene with his carriers. The Japanese admirals involved were often slow to communicate important information to each other.[92]
The experienced Japanese carrier aircrews performed better than those of the U.S., achieving greater results with an equivalent number of aircraft. The Japanese attack on the American carriers on 8 May was better coordinated than the U.S. attack on the Japanese carriers. The Japanese suffered much higher losses to their carrier aircrews, however, losing ninety aircrew killed in the battle compared with thirty-five for the Americans. Japan's cadre of highly skilled carrier aircrews with which it began the war were, in effect, irreplaceable because of an institutionalized limitation in its training programs and the absence of a pool of experienced reserves or advanced training programs for new airmen. Coral Sea started a trend which would result in the irreparable attrition of Japan's veteran carrier aircrews by the end of October 1942.[93]
While the Americans did not perform as expected, they did learn from their mistakes in the battle and made improvements to their carrier tactics and equipment, including fighter tactics, strike coordination, torpedo bombers, and defensive strategies, such as anti-aircraft artillery, which contributed to better results in later battles. Radar gave the Americans a limited advantage in this battle, but its value to the U.S. Navy would increase over time as the technology improved and the Allies learned how to employ it more effectively. Following the loss of Lexington, improved methods for containing aviation fuel and better damage control procedures were implemented by the Americans.[94] Coordination between the Allied land-based air forces and the U.S. Navy was poor during this battle, but this too would improve over time.[95]
A 13 May 1942 editorial cartoon from the Japanese English-language newspaper Japan Times & Advertiserdepicts a dejected Uncle Sam joiningWinston Churchill in erecting grave markers for Allied ships which Japan had sunk, or claimed to have sunk, at Coral Sea and elsewhere.
Japanese and U.S. carriers would face off against each other again in the battles of Midway, the Eastern Solomons, and the Santa Cruz Islands in 1942, and thePhilippine Sea in 1944. Each of these battles was strategically significant, to varying degrees, in deciding the course and ultimate outcome of the Pacific War.[96]
Tactical and strategic implications
Both sides publicly claimed victory after the battle. In terms of ships lost, the Japanese won a tactical victory by sinking an American fleet carrier, an oiler, and a destroyer – 41,826 long tons (42,497 t) – versus a light carrier, a destroyer, and several smaller warships – 19,000 long tons (19,000 t) – sunk by the Americans. Lexington represented, at that time, 25% of U.S. carrier strength in the Pacific.[97] The Japanese public was informed of the victory with overstatement of the American damage and understatement of their own.[98]
In strategic terms, however, the Allies won because the seaborne invasion of Port Moresby was averted, lessening the threat to the supply lines between the U.S. and Australia. Although the withdrawal of Yorktown from the Coral Sea conceded the field, the Japanese were forced to abandon the operation that had initiated the Battle of Coral Sea in the first place.[99]
The battle marked the first time that a Japanese invasion force was turned back without achieving its objective, which greatly lifted the morale of the Allies after a series of defeats by the Japanese during the initial six months of the Pacific Theater. Port Moresby was vital to Allied strategy and its garrison would most likely have been overwhelmed by the Japanese invasion troops. The Navy, however, also exaggerated the damage it inflicted,[100] which was to cause the press to treat its reports of Midway with more caution.[101]
The results of the battle had a substantial effect on the strategic planning of both sides. Without a hold in New Guinea, the subsequent Allied advance, arduous though it was, would have been more difficult.[102] For the Japanese, who focused on the tactical results, the battle was seen as merely a temporary setback. The results of the battle confirmed the low opinion held by the Japanese of American fighting capability and supported their belief that future carrier operations against the U.S. were assured of success.[103]
Midway
One of the most significant effects of the Coral Sea battle was the loss of ShЈkaku and Zuikaku to Yamamoto for his planned showdown with the American carriers at Midway (ShЈhЈ was to have been employed at Midway in a tactical role supporting the Japanese invasion ground forces). The Japanese believed that they sank two carriers in the Coral Sea, but this still left at least two more U.S. Navy carriers, Enterprise and Hornet, which could help defend Midway. The aircraft complement of the American carriers was larger than that of their Japanese counterparts, which, when combined with the land-based aircraft at Midway, meant that the Combined Fleet no longer enjoyed a significant numerical aircraft superiority over the Americans for the impending battle. In fact, the Americans would have three carriers to oppose Yamamoto at Midway, because Yorktown remained operational despite the damage from Coral Sea, and the U.S. Navy was able to patch her up sufficiently at Pearl Harbor between 27 and 30 May to allow participation in the battle. At Midway, Yorktown's aircraft played crucial roles in sinking two Japanese fleet carriers. Yorktown also absorbed both Japanese aerial counterattacks at Midway which otherwise would have been directed at the two remaining American carriers.[104]
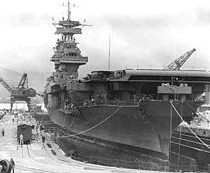
In contrast to the strenuous efforts by the Americans to employ the maximum forces available for Midway, the Japanese apparently did not even consider trying to include Zuikaku in the operation. No effort appears to have been made to combine the surviving ShЈkaku aircrews with Zuikaku's air groups or to quickly provide Zuikaku with replacement aircraft so she could participate with the rest of the Combined Fleet at Midway. ShЈkaku herself was unable to conduct further aircraft operations, with her flight deck heavily damaged, and she required almost three months of repair in Japan.[105]
Historians H. P. Willmott, Jonathan Parshall, and Anthony Tully believe Yamamoto made a significant strategic error in his decision to support the MO with strategic assets. Since Yamamoto had decided the decisive battle with the Americans was to take place at Midway, he should not have diverted any of his important assets, especially fleet carriers, to a secondary operation like MO. Yamamoto's decision meant Japanese naval forces were weakened just enough at both the Coral Sea and Midway battles to allow the Allies to defeat them in detail. Willmott adds, if either operation was important enough to commit fleet carriers, then all of the Japanese carriers should have been committed to each in order to ensure success. By committing crucial assets to MO, Yamamoto made the more important Midway operation dependent on the secondary operation's success.[106]
Moreover, Yamamoto apparently missed the other implications of the Coral Sea battle: the unexpected appearance of American carriers in exactly the right place and time to effectively contest the Japanese, and U.S. Navy carrier aircrews demonstrating sufficient skill and determination to do significant damage to the Japanese carrier forces. These would be repeated at Midway, and as a result, Japan lost four fleet carriers, the core of her naval offensive forces, and thereby lost the strategic initiative in the Pacific War. Parshall and Tully point out that, due to American industrial strength, once Japan lost its numerical superiority in carrier forces as a result of Midway, Japan could never regain it. Parshall and Tully add, "The Battle of the Coral Sea had provided the first hints that the Japanese high-water mark had been reached, but it was the Battle of Midway that put up the sign for all to see."[107]
Situation in the South Pacific
The Australians and U.S. forces in Australia were initially disappointed with the outcome of the Battle of the Coral Sea, fearing the MO operation was the precursor to an invasion of the Australian mainland and the setback to Japan was only temporary. In a meeting held in late May, the Australian Advisory War Council described the battle's result as "rather disappointing" given that the Allies had advance notice of Japanese intentions. General MacArthur provided Australian Prime Minister John Curtin with his assessment of the battle, stating that "all the elements that have produced disaster in the Western Pacific since the beginning of the war" were still present as Japanese forces could strike anywhere if supported by major elements of the IJN.[108]
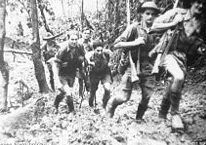
Because of the severe losses in carriers at Midway, however, the Japanese were unable to support another attempt to invade Port Moresby from the sea, forcing Japan to try to take Port Moresby by land. Japan began its land offensive towards Port Moresby along the Kokoda Track on 21 July from Buna and Gona. By then, the Allies reinforced New Guinea with additional troops (primarily Australian). The added forces slowed, then eventually halted the Japanese advance towards Port Moresby in September 1942, and defeated an attempt by the Japanese to overpower an Allied base at Milne Bay.[109]
In the meantime, the Allies sought to take advantage of their victories at Coral Sea and Midway by seizing the strategic initiative from Japan. The Allies chose Tulagi and nearby Guadalcanal as the target of their first offensive. The failure of the Japanese to take Port Moresby, and their defeat at Midway, had the effect of dangling their base at Tulagi without effective protection from other Japanese bases. Tulagi was four hours flying time from Rabaul, the nearest large Japanese base.[110]
On 7 August 1942, 11,000 U.S. Marines landed on Guadalcanal and 3,000 U.S. Marines landed on Tulagi and nearby islands.[111] The Japanese troops on Tulagi and nearby islands were outnumbered and killed almost to the last man in the Battle of Tulagi and Gavutu-Tanambogo while the U.S. Marines on Guadalcanal captured an airfield under construction by the Japanese.[112] Thus began the Guadalcanal and Solomon Islands Campaigns that resulted in a series of attritional, combined-arms battles between Allied and Japanese forces over the next year which, in tandem with the New Guinea campaign, eventually neutralized Japanese defenses in the South Pacific, inflicted irreparable losses on the Japanese military—especially its navy—and contributed significantly to the Allies' eventual victory over Japan.[113]
The delay in the advance of Japanese forces also allowed the United States Marine Corps to land on Funafuti on October 2, 1942, with a Naval Construction Battalion (Seabees) building airfields on three of the atolls of Tuvalu from which units of the USAAF B-24 Liberator bombers of the Seventh Air Force operated. The atolls of Tuvalu acted as a staging post during the preparation for the Battle of Tarawa and the Battle of Makin that commenced on 20 November 1943, which was the implementation of operation 'Galvanic'.[114]
Share this page

Most popular
Features
- ЁЄ Halston- Des Moines
- ЁЄ About Bout Guess
- ЁЄ Sawgrass Mills
- ЁЄ Dry Tortugas National Park
- ЁЄ Washington Union Station
- ЁЄ Business travel growth sluggish, report sa
- ЁЄ Sensational fall festivals
- ЁЄ A NOISELESS, PATIENT SPIDER
- ЁЄ California State Route 1
- ЁЄ Lane Home Furnishings
- ЁЄ Savoy Kitchen, Alhambra


